If the Trex unit is powers the transmitter, there is no prompt/option to enable or disable the internal 167 Ohm resistor. The Trex unit automatically applies the resistor when you enable power to a transmitter from the device connection wizard.
If the Trex unit is connected to an externally-powered HART transmitter, the device connection wizard prompts you if you want to increase loop resistance. The Trex unit then selects the 250 Ohm or 500 Ohm resistor; you cannot select a specific value. The selected resistor value is not displayed on the screen.
-
If you want the Trex unit to power a 2-wire HART transmitter, do
the following:
-
Connect the lead set to the HART + pwr terminals on the Trex
unit and to the communication terminals on the device.

Connection for providing power to a 2-wire HART transmitter
-
Connect the lead set to the HART + pwr terminals on the Trex
unit and to the communication terminals on the device.
-
If the Trex unit is connected to an externally-powered 2-wire HART
transmitter, do the following:
-
Connect the lead set to the HART terminals on the Trex unit
and to the communication terminals on the device in-series. (If you are
connecting to a 4-wire transmitter, connect the Trex unit in parallel.)
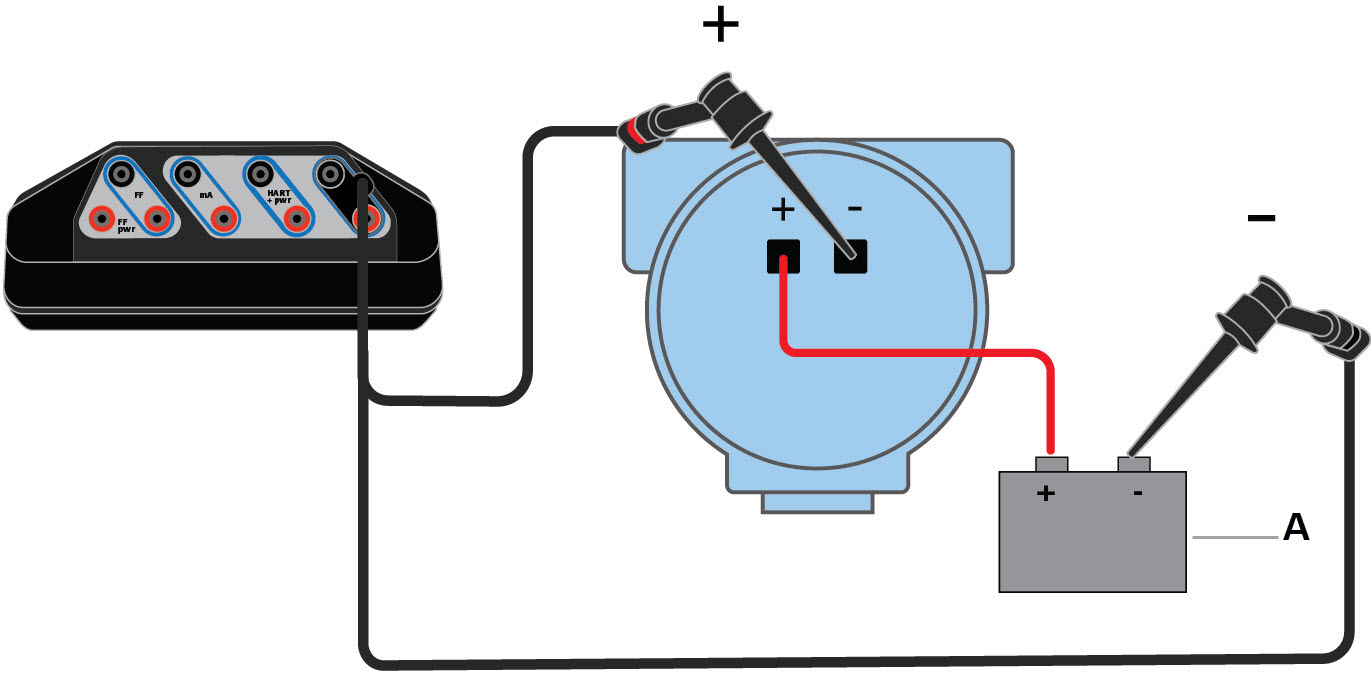
Connection for an externally-powered 2-wire transmitter
- Voltage source
-
Connect the lead set to the HART terminals on the Trex unit
and to the communication terminals on the device in-series. (If you are
connecting to a 4-wire transmitter, connect the Trex unit in parallel.)
- To disable the internal resistor, disconnect the device from the Trex unit, or close the Field Communicator application.