Power a positioner

If you try to apply power from the Trex unit when the device is externally-powered, the Loop Diagnostics application prevents the Trex unit from supplying power. This protects the Trex unit from damage.

CAUTION:
Remove the USB cable from the Trex unit before connecting to a device.
CAUTION:
Do not add any external power to the device when the Trex unit is powering the device. This can blow a fuse inside the Trex unit. The repair/replacement will need to be completed at an authorized service center. Ensure the device is disconnected from the loop/segment and no other wires are connected to the device before providing power from the Trex unit.
  1. Connect the lead set to the HART + pwr terminals on the Trex unit and to the positioner.

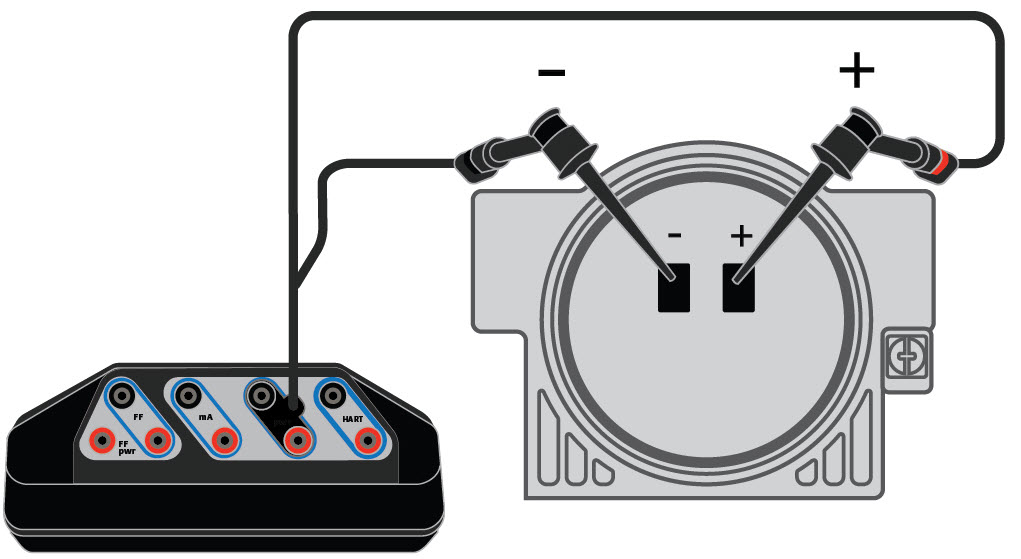
    Connection for powering a positioner

  2. On the Loop Diagnostics screen, tap Trex Unit Power.
  3. Select one of the following:
    Option Description
    Power Positioner with 4 mA (0%) Power a positioner using 4 mA.
    Power Positioner with 20 mA (100%) Power a positioner using 20 mA.
    Power Positioner with other mA value Power a positioner using a specified mA value.
  4. Tap OK.
    Loop Diagnostics is now powering the positioner and measuring voltage and current. The Trex Unit Current option is also enabled.
  5. To change the current value, tap one of the quick current buttons (4 mA, 8 mA, 12 mA, 16 mA, 20 mA), or use the up and down arrow keys to manually increase the current value. The default increment is 0.1 mA.
  6. To stop powering the device, do one of the following:
    • Tap Trex Unit Power to set the option to OFF. You are prompted to select a power option to set the position of the valve.
    • Tap Exit. You are prompted to select a power option to set the position of the valve.
    • Remove the lead set from the Trex unit. You are not prompted to select a power option to set the position of the valve.