Prerequisites
Overview
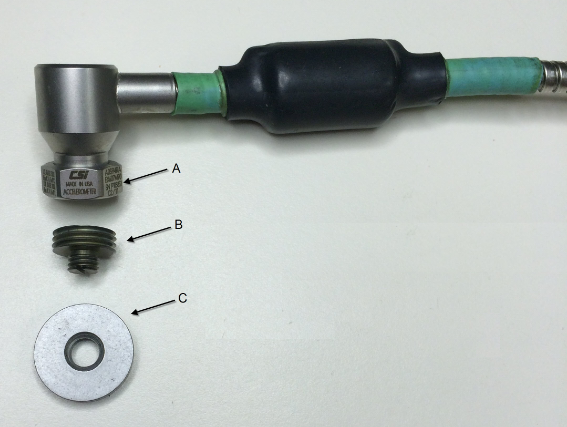
Figure 1 shows a typical accelerometer, mounting stud, and mounting pad used with the CSI 9420. The mounting pad is only necessary when doing an epoxy mount.
Figure 1. Accelerometer, mounting stud, and optional mounting pad
- accelerometer
- mounting stud (included with the accelerometer)
- mounting pad
Procedure
-
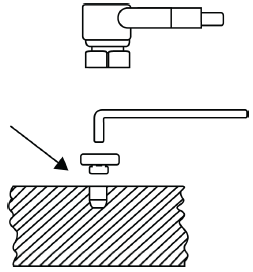
Rub a small amount of semi-permanent thread locker onto the
mounting location.
Figure 2. Apply thread locker onto mounting location
-
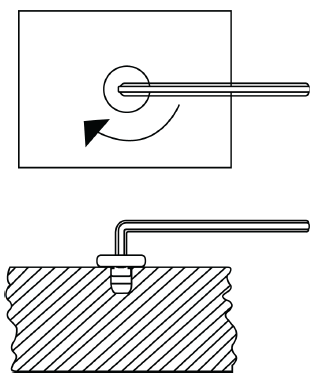
Using a torque wrench with 1/8 in. hex bit, torque to 7–8 ft-lb
(9.5–10.8 N-m) to tighten the mounting stud.
Figure 3. Tighten the mounting stud
 For stud mount: If the mounting stud is still not seated against the spot face after you apply the correct torque force, it indicates that the tap hole is not deep enough. Remove the mounting and tap a deeper hole.
 -
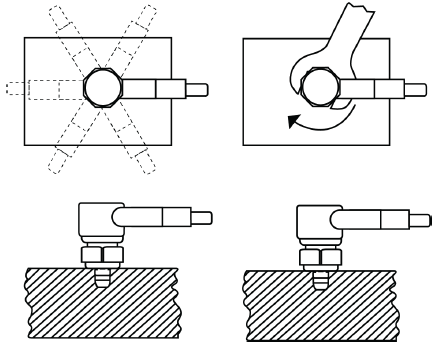
Place the sensor onto the mounting stud and hold it to create the
least amount of cable strain and cable exposure. While holding the sensor,
hand-tighten the 9/16 in. captive nut and use a torque wrench with 9/16 in.
open end to finish tightening to 2–5 ft-lb (2.7–6.8 N-m).
Figure 4. Hand-tighten the captive nut
 If the mounting stud does not disengage from the sensor, use a flathead screwdriver to hold the stud and turn the hex nut counter-clockwise with a wrench.